Imagine a world where your motions can be tracked and translated into digital data, where your smartphone knows exactly how you're holding it, or where your game character moves as you do. This isn't just imagination, but a reality made possible by the MPU6050 sensor module. This tiny but powerful device has revolutionized motion sensing in various gadgets and applications. In this article, we'll delve into the MPU6050's fascinating capabilities and how it's shaping the technology around us.
The MPU6050 sensor module marks a significant advance in motion tracking technology. Combining a 3-axis gyroscope and a 3-axis accelerometer, it offers an impressive six degrees of freedom (DoF).
At its heart, the MPU6050 serves dual roles. As a gyroscope, it's adept at measuring rotational rates, which are critical for determining orientation in space. As an accelerometer, it captures linear acceleration from movement or gravity, allowing for detailed motion tracking in 3D space.

| Pin Number | Pin Name | Pin Detail |
|---|---|---|
| 1 | VCC | Power supply input, typically 3.3V or 5V |
| 2 | GND | Ground |
| 3 | SCL | I2C Clock Line (Serial Clock Line) |
| 4 | SDA | I2C Data Line (Serial Data Line) |
| 5 | XDA | Auxiliary I2C Data Line (Auxiliary Data) |
| 6 | XCL | Auxiliary I2C Clock Line (Auxiliary Clock) |
| 7 | AD0 | I2C Address Select (Low for 0x68, High for 0x69) |
| 8 | INT | Interrupt Output |
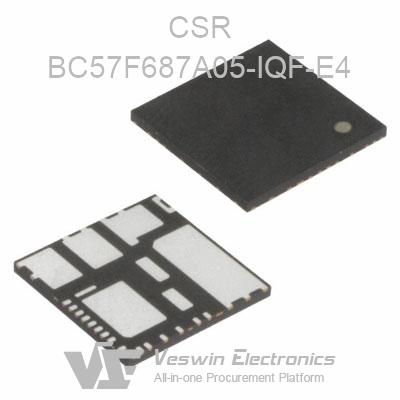
The MPU-6050 datasheet provides detailed information about this 6-axis MotionTracking device, which combines a 3-axis gyroscope and a 3-axis accelerometer. Key features include a programmable full-scale range for both gyroscopes (±250, ±500, ±1000, ±2000 degrees/sec) and accelerometers (±2g, ±4g, ±8g, ±16g). It outlines the MPU-6050's pinout, electrical properties, and I2C communication protocol specifics. Designed for low-power consumption, it's ideal for mobile and wearable technology applications. The datasheet also includes information on the device's size, power requirements, and additional features like orientation and tap detection, making it a crucial resource for integration into various systems.
MPU-6050 Datasheet PDF Download
| Specification Category | Details |
|---|---|
| General | |
| Part Number | MPU-6050 |
| Manufacturer | TDK Corporation. |
| Type | MEMS (6-axis) Gyroscope and Accelerometer |
| Performance | |
| Gyroscope Sensing Range | ±250, ±500, ±1000, ±2000 °/sec |
| Accelerometer Sensing Range | ±2g, ±4g, ±8g, ±16g |
| Gyroscope Sensitivity | 131 LSBs/°/sec (for ±250 °/sec) |
| Accelerometer Sensitivity | 16384 LSB/g (for ±2g) |
| Electrical Characteristics | |
| Supply Voltage | 2.3V to 3.4V |
| Operating Current | 3.9mA |
| Interface | I2C, up to 400 kHz |
| Physical Characteristics | |
| Operating Temperature | -40°C to +85°C |
| Package | QFN (Quad Flat No-leads), 4x4x0.9 mm |
6-Axis MotionTracking: Integrates a 3-axis gyroscope and a 3-axis accelerometer
Gyroscope Range: Captures a wide range of rotational motions
Accelerometer Range: Measures a spectrum of linear movements
Digital Output: High-resolution 16-bit analog-to-digital conversion
Digital Motion Processor™ (DMP): Offloads complex computations from the host processor
Programmable Digital Filters: Customizable for both gyroscope and accelerometer
I2C Communication Protocol: Broad compatibility with microcontrollers and systems
Auxiliary I2C Bus: Extends to 9-axis motion tracking
Integrated Temperature Sensor: For sensor reading compensation
Programmable Interrupts: Supports advanced features like gesture recognition
Low Power Consumption: Ideal for battery-powered devices
Small Footprint: Suitable for space-constrained applications

While the ADXL345 is solely an accelerometer, the MPU6050 steps up the game by incorporating gyroscope functionality, offering a more comprehensive solution for applications that require both orientation and rotational data.

The MPU6000 shares similarities with the MPU6050 but stands out with its dual I2C and SPI interface options, enhancing its compatibility with a wider range of microcontrollers.
Motion Tracking and Analysis: Revolutionizes gaming, virtual reality, gesture control, and sports analytics.
Orientation and Navigation: Key in drones, robotics, and wearable tech.
Activity Monitoring: Tracks fitness and health metrics like walking and cycling.
Stabilization Solutions: Essential in camera stabilization and vehicle control systems.
VCC: Connect the VCC pin of the MPU6050 to the 3.3V output on the Arduino.
GND: Attach the GND pin to any ground pin on the Arduino.
SCL: Link the SCL (Serial Clock) pin to the A5 pin on the Arduino Uno (or the SCL pin on other Arduino models).
SDA: Connect the SDA (Serial Data) pin to the A4 pin on the Arduino Uno (or the SDA pin on other models).
INT (Optional): The INT pin can be connected to a digital pin on the Arduino for utilizing the interrupt feature.
VCC: Link to the ESP32's 3.3V output.
GND: Attach to a ground pin on the ESP32.
SCL: Connect to the default SCL pin of the I2C bus on the ESP32 (usually GPIO 22).
SDA: Connect to the default SDA pin of the I2C bus on the ESP32 (commonly GPIO 21).
INT (Optional): Can be connected to any GPIO pin for using interrupts.
Calibration and Testing of the MPU6050
Stable Surface: Ensure the MPU6050 is placed on a perfectly level surface.
Calibration Sketch: Run a dedicated calibration sketch in your Arduino IDE to generate calibration values.
Record Values: Carefully note the resulting accelerometer and gyroscope calibration values.
Update Code: Integrate these values into your main project code to enhance accuracy.
Calibration is crucial to correct sensor biases and drift.
Ensure a vibration-free, stationary setup during calibration for optimal results.
Library Installation: In Arduino IDE, go to Sketch > Include Library > Manage Libraries. Search and install "MPU6050".
Basic Usage: Access examples via File > Examples > MPU6050 in the IDE for fundamental sensor reading codes.
Customization: Modify the examples or create bespoke code to meet your project requirements.
Python Libraries: Use libraries like smbus for I2C interfacing.
Wiring Setup: Connect SDA and SCL to the Raspberry Pi’s GPIO pins (typically GPIO 2 for SDA and GPIO 3 for SCL), along with power and ground.
Python Scripting: Write or use existing Python scripts to read data from the MPU6050. Manage I2C communication effectively to capture sensor data.
Affordability: The MPU6050 typically ranging from a few dollars to around $10 USD, offering a cost-effective solution for motion sensing needs.
Availability: Veswin Electronics has a large number of original and brand new MPU6050 in stock.Contact us now!
Sensor Capabilities: The MPU9250 steps ahead with a 9-axis system, adding a magnetometer to the 6-axis setup of the MPU6050, enhancing spatial orientation capabilities.
Communication Flexibility: Both support I2C, but the MPU9250 also accommodates SPI, offering greater versatility.
Suitable Applications: Opt for the MPU9250 when compass functionality (heading information) is vital, like in advanced navigation systems.
Sensor Fusion: The BNO055's onboard sensor fusion algorithm streamlines software development by simplifying the data processing requirements.
Data Output: Unlike the MPU6050’s raw data output, the BNO055 can directly provide processed orientation data (like quaternion, Euler angles).
Pricing: Reflecting its sophisticated features, the BNO055 is usually priced higher than the MPU6050.
Robotics and Drones: For basic motion sensing, the MPU6050 suffices. However, for comprehensive navigation requiring compass data, consider the MPU9250.
Wearable Devices: The MPU6050’s low power consumption and compact size make it ideal for wearables. The BNO055, offering advanced orientation data, is suitable where space and power are not major constraints.
VR and Gaming: In these domains, precision and responsiveness are crucial. While the MPU6050 is competent, 9-axis sensors like the MPU9250 provide a more rounded solution for 3D space mapping.
Educational and Hobbyist Projects: The MPU6050 is highly recommended due to its simplicity, affordability, and strong online community and resource support.
Robotics: The MPU6050 is vital for balance in robotics, providing precise data for equilibrium maintenance.
Drones: Key for stabilization and navigation in drones, aiding in complex maneuvers and control.
Wearable Tech: In devices like fitness trackers and smartwatches, it tracks activities and gestures with precision.
Virtual Reality (VR): It enriches VR experiences by accurately tracking user movements for more interactive environments.
Automotive: Used in advanced driver-assistance systems (ADAS) for enhanced safety features like collision avoidance and stability control.
Hand Gesture-Controlled Robots: Create robots or drones that respond to hand movements using the MPU6050.
DIY VR Controllers: Innovate immersive gaming experiences with self-made VR controllers.
Custom Fitness Trackers: Design wearable devices for personalized activity and orientation tracking.
Educational Tools: Utilize in teaching concepts in physics and mathematics through hands-on motion tracking experiments.
The aim of this project is to demonstrate the practical application of the MPU6050 by creating a robot that can be controlled through hand gestures. This project emphasizes the MPU6050’s capabilities in sensing motion and orientation, showcasing its use in robotics and human-machine interface applications.
MPU6050 module
Arduino UNO (or any compatible microcontroller)
A two-wheel robot chassis kit (including motors and wheels)
Motor Driver (e.g., L298N)
A battery pack (for powering the Arduino and motors)
Jumper wires
Optional: Bluetooth module for wireless communication
The MPU6050 will be used to detect tilt and motion gestures of the hand. These gestures will be translated into commands to control the movement of the robot – forward, backward, left, and right. The Arduino microcontroller processes the MPU6050 data and sends appropriate signals to the motor driver, which in turn controls the robot's motors.
Setting Up MPU6050 with Arduino:
Connect the MPU6050 to the Arduino using I2C communication.
Calibrate the MPU6050 to ensure accurate readings.
Develop a program to read the accelerometer and gyroscope data from the MPU6050.
Assemble the two-wheel robot chassis.
Connect the motors to the motor driver, and then to the Arduino.
Write a program for the Arduino to interpret the MPU6050 data. For example, tilting the sensor forward makes the robot move forward, tilting it to the right makes the robot turn right, and so on.
Implement a safety feature to stop the robot if no gesture is detected for a certain period.
Test the robot in a controlled environment.
Calibrate the sensitivity and response of the MPU6050 to ensure smooth operation.
Integrate a Bluetooth module for wireless control.
Develop an app or use an existing app for remote gesture control.
This project showcases the versatility and efficiency of the MPU6050 in real-time motion tracking and control applications. It demonstrates how the module can be integrated into robotics, offering a hands-on experience in building and programming.
Explore a plethora of online resources, including detailed MPU6050 Arduino tutorials, accessible for beginners to advanced users.
Engage with vibrant online communities on platforms like GitHub, Instructables, and Reddit, offering a wealth of projects, ideas, and code libraries.
Connectivity: Ensure solid soldering and connections; consider using pull-up resistors on I2C lines for stability.
Data Precision: Perform regular calibrations for enhanced sensor accuracy.
Data Processing: Implement filtering algorithms for smoother data output.
Optimal Data Handling: Efficiently read and process sensor data to maintain microcontroller performance.
Sensor Longevity: Protect the sensor from physical stress and ensure a stable power supply for extended lifespan.
Advanced Programming: Tap into the capabilities of the Digital Motion Processor (DMP) for sophisticated applications.
The MPU6050 sensor opens a world of possibilities, from simple DIY projects to complex technological innovations. Its blend of affordability and ease of use makes it a prime choice for educational and creative endeavors in motion tracking and orientation sensing. With the MPU6050, students, hobbyists, and engineers alike can delve into the exciting realm of gyroscopes and accelerometers, uncovering endless opportunities for learning and project development.
What does the MPU6050 do?
The MPU6050 is a sensor module combining a 3-axis gyroscope and a 3-axis accelerometer. It measures rotational motion and linear acceleration along three axes, making it suitable for motion tracking, orientation detection, and gesture recognition in devices like drones, smartphones, and gaming controllers.
What is the difference between the MPU6000 and MPU6050?
The primary distinction between the MPU6000 and MPU6050 lies in their communication interfaces. The MPU6000 supports both I2C and SPI, offering versatility for various microcontroller interfaces. In contrast, the MPU6050 only supports I2C. Both sensors provide similar gyroscope and accelerometer capabilities.
How does the MPU6050 compare to the ADXL345?
While both the MPU6050 and ADXL345 are motion sensors, the MPU6050 is a 6-axis sensor (3-axis gyroscope and accelerometer), whereas the ADXL345 is solely a 3-axis accelerometer. Thus, the MPU6050 can measure both rotational motion and linear acceleration, whereas the ADXL345 measures only linear acceleration.
What is the price range for the MPU6050?
The MPU6050 is known for being affordable, typically priced between a few dollars to around $10 USD per unit. Prices may vary depending on the supplier, purchase quantity, and market conditions.
How do you calibrate an MPU6050 module for accurate readings?
Calibration of the MPU6050 involves placing the sensor on a stable, level surface and running a calibration program to determine accelerometer and gyroscope offsets. These offsets are then applied in the main program to fine-tune the sensor's readings, enhancing accuracy.
Can the MPU6050 be used with an ESP32?
Yes, the MPU6050 is compatible with the ESP32 microcontroller, connecting through the I2C communication protocol. The SCL and SDA pins of the MPU6050 need to be connected to the corresponding I2C pins on the ESP32.
What are the key features of the MPU6050 accelerometer?
3-axis acceleration measurement with ranges of ±2g, ±4g, ±8g, and ±16g.
16-bit digital output.
Low power consumption.
High sensitivity and accuracy.
Integrated Digital Motion Processor (DMP) for enhanced processing.
How do I connect the MPU6050 to an Arduino?
Connect the VCC pin of the MPU6050 to the 3.3V output on the Arduino.
Connect the GND pin to a ground pin on the Arduino.
Connect the SCL pin to the A5 pin (or SCL pin) on the Arduino.
Connect the SDA pin to the A4 pin (or SDA pin) on the Arduino.
What is the MPU6050's register map?
The MPU6050's register map consists of addresses used to configure the sensor and read values from it. These registers enable setting parameters like gyroscope and accelerometer ranges, configuring power settings, and reading sensor data. Detailed in the MPU6050's datasheet, this map is crucial for programming the sensor for specific uses.
Hot News